A while ago I painted my first Infinity miniature, a very dynamic kind of cyber ninja lady. When I thought about the base the idea came up that she would be invading an enemy base with the help of an army of cyber spiders. The spiders are helping her to make it hard for the enemys to spot her.
How would the spiders invade the building and how can I show that they help her?
To me it was obvious that they entered the building before her and used the ventilation system to get in and spread. A camera would be the perfect victim for them to show them in action. I planned the walls and floor clean and sterile, but I think I made them a bit too boring, same for the ventilation system. Also the scene is a bit too big for the miniature, I should have taken a wood cube one size smaller. On the Hussar 2013 in Warsaw I saw a base that gave me an idea how I should have done the walls, floor and ventilation system....but enough about that, let's start!
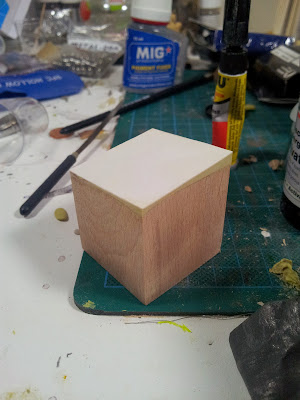
First I took my saw and cut off an piece in an angle. As the cut wasn't perfectly smooth I sanded it a bit and glued a piece of plasticard on it that overlapped over the edges. I filled the visible holes from the sides with milliput and also let this overlap over the edges of the wood cube. See here:
When the miliput was dry I sanded the edges of plasticard and miliput down to the edges of the wood cube to get a smooth transition between wood cube, milliput and plasticard.
Then I held a piece of plasticard in the desired position onto the base. I marked the position of the ruler on the plasticard with a permanent marker. I repeated the whole process for the second marking on the plasticard.
I then cut out another piece of plasticard with the heigth of cube and backwall and the broadth of the cube. I glued this peace onto the back of the wood cube. There was a huge gap between the just glued on plasticard piece and the wall. So to get more stability into the back of the wall I glued some plasticard pieces into the gap and then I filled it up with plaster, as this goes quiet easy and fast.
I sanded the plaster down, in some areas small pieces broke off, but I just filled those gaps again with plaster. Also while sanding, the plasticard got a bit detached from the plaster, but I just glued it onto the plaster with super glue, filled the gaps with plaster and sanded it down again. No big problem. The only thing that I experienced with the plaster is that the wood cube absorbs the water, becomes bigger and when it drys it shrinks again. By this in some places where the connections between wood and plasticard or plaster were, gaps were more likely to appear. Lately I've build another base for another miniature where I put some milliput on top of a wood cube and let it dry in the oven. After the milliput was dry there were really big gaps, 1 mm or so, between the overlapping edges of milliput and wood. I sanded it down and after some days, when the base was already finished, the milliput layer was smaller then the wood cube surface it was attached to. This means never underestimate the swelling and shrinking of wood when it comes into contact with water!
This is the socket already with the start of the ventilation system attached to it, which was again made out of two stripes of plasticard.
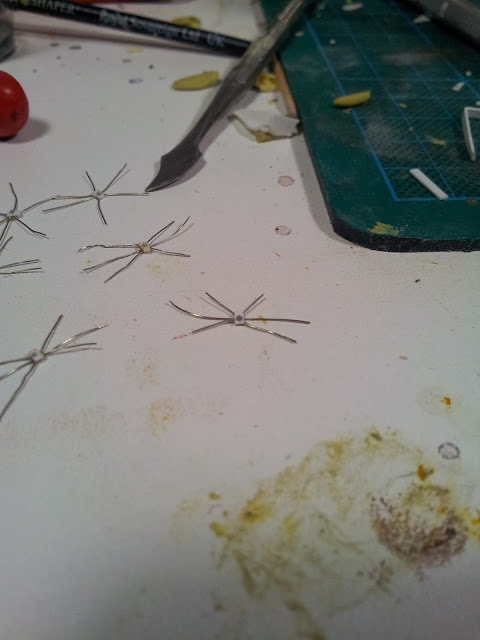
I had cut a hole into the ventilation system with a hole punch tool, which the spiders had cut out to spread into the room. On the photo you can see the first version of the spiders, still four legged. For the spiders I took a wee piece of plasticard in the form of a rectangle. I took three thin pieces of wire for each spider, layed them on top of each other so they overlapped on one point. On this point I put a drop of super glue and some accelerator. When dry, I pressed the back/flat side of the handle of my hobby knife onto that connection point of the wires to flatten it. Then I took the piece of plasticard and glued it on top. Again after it was dry, I pressed the back of my hobby knife onto it to flatten it.
I then drilled a wee hole into the plasticard (of cause I didn't drill all through it) and glued a small pearl from a brita water filter into it as an light bulb/eye/antenna thingy. Just a little detail that looks nice. This is how my army of cyber spiders looked finished:
And a detail shot:
To get the legs into the right shape I first cut them into length, then I bend them all upwards. I took a pointy tweezer and bend the legs down from a point so that the part of the leg going up is a bit shorter then the part going down, which will touch the ground. I then bend the legs with the tweezer into different walking positions and glued them onto the base with super glue.
If I remember correctly at this point I teared them off the base again, because Luke said the "knees" of the spider are toooo round. Right he was. So I took my tweezer and pressed the knees into a sharper form. Glued them all to the base again. Also as the wall was really toooo booring I glued a H-profil (vertical) and a plasticard stripe with two thin plastic "staffs" (horizontal) onto it. Also I cut two grooves into the floor so I would be able to paint a light strip on the floor. This is the base primed:
I painted the base mainly in bluegrey tones to make it look cold and technical. Also when the spiders in the ventilation system were finished, I glued the top of that channel onto it.
As somehow something was still missing, my friend Sascha suggested to put some H-steal-beams on top of the ventilation system. So I cut out some strips of plasticard. For the vertical middle ones in the steal beams I cut out some half circles out of the plasticard strip. Then I glued them together as a H-steal-beam, three of them in total, and finally attached them to the base and painted them.
Also now you can see on the base a circular thing lying on the floor that the spiders cut out to get into the room. This is the finished scene. I learned quiet a lot, mainly more planning needs to be done before building and I need to be more precise and clean (buildingwise)....I'm a dirty, dirty bastard...
The scene I saw at the hussar that inspired me how I should have done the walls is this one:
So I hope you liked this little step by step. Read you soonish!
PS: Yes, I know spiders do have eight legs, but I was happy to be able to give them six legs, eight would have been a lot more complicated, I say now...


.jpg)
Keine Kommentare:
Kommentar veröffentlichen