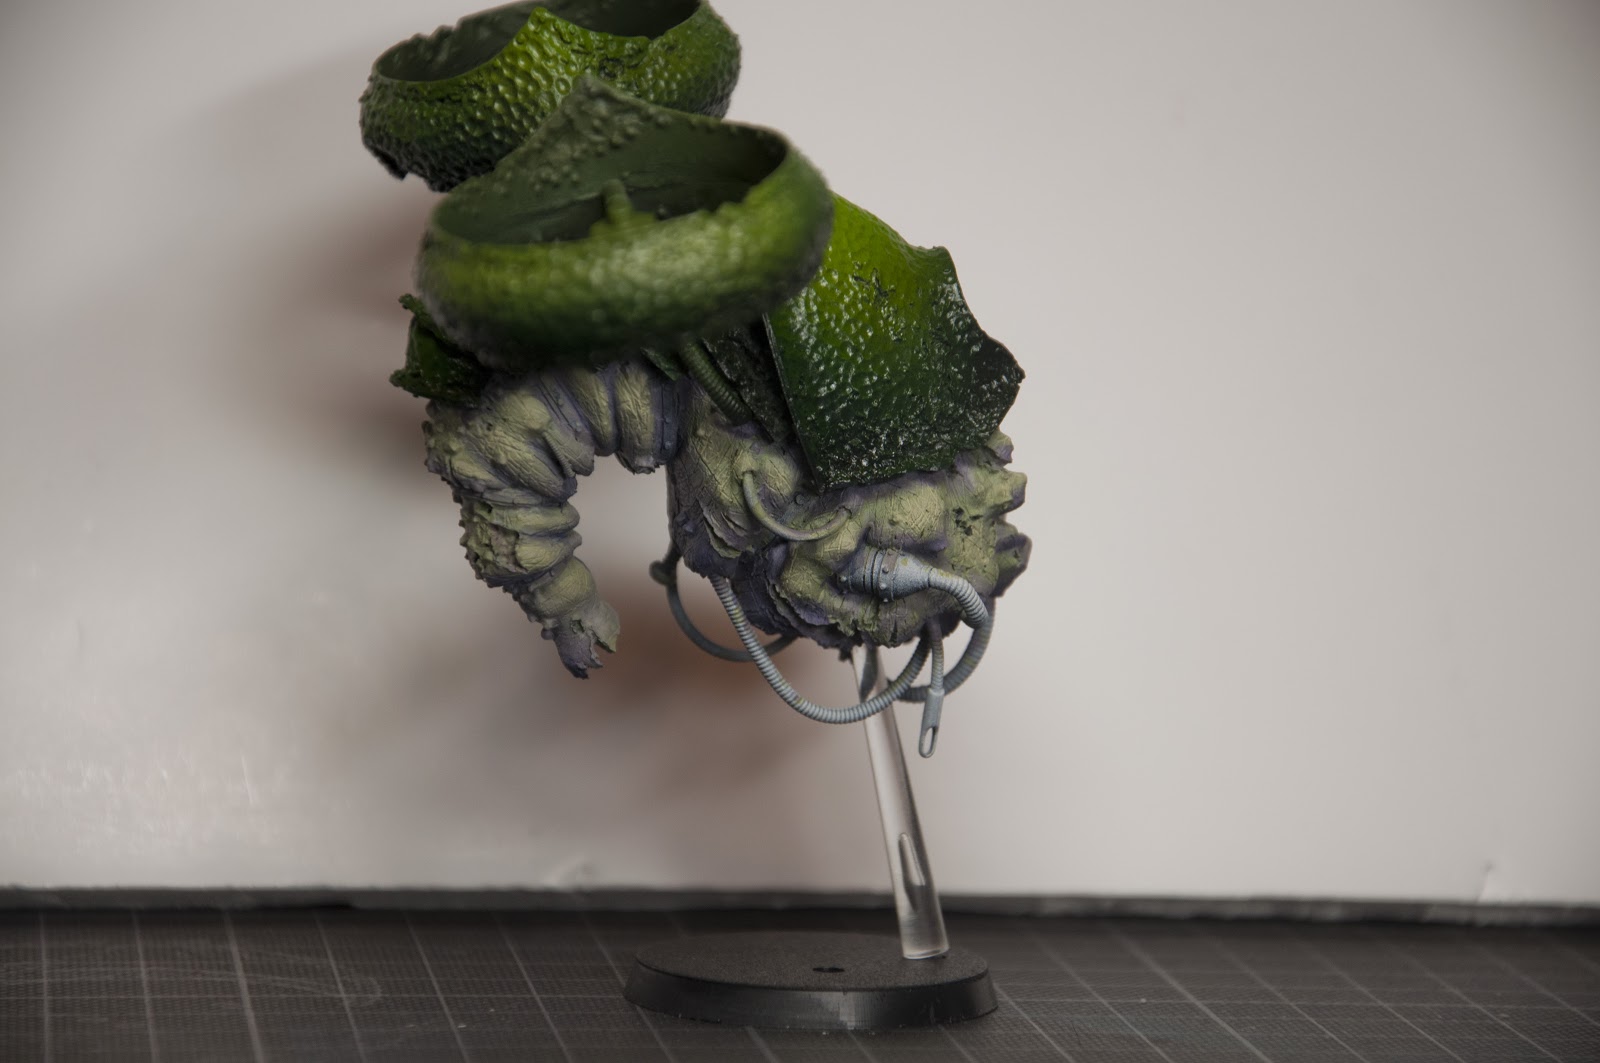
This time, we'll paint the Nurgle Blight Drone from Forgeworld.
You will notice, that there is a socket in the first pictures, which was replaced with a normal gaming base.
The project changed during its process, I decided to use the drone as gaming model in my new Nurgle army.
The base won't be finished during the article, because I have to wait for some basing materials.
As the whole thing became gaming stuff, there are areas which could need a little bit more work, but hey, investing more time wouldn't be a problem for cabinet stuff.
We start as usual, with our list of needed stuff:
Games Workshop colors:
Castellan Green
Incubbi Darkness
Abbadon Black
Flash Git Yellow
White Scar
Nurgling Green
Slanesh Grey
Deamonette Hide
Sreaming Scull
Brass Scorpion
Screaming Bell
Vallejo colors:
Dark Sea Blue
Silver
Tamyia colors:
Clear Green
Clear Yellow
Clear Blue
Tamyia Thinner XV-20A
oil color:
Burnt Umber
White Spirit
Ard'Coat Gloss Varnish
Lamyian Medium Matte Varnish
Masking Tape
Part One - the armour
The model and socket were primed using the two component method, which means you spray the whole thing black first (everything should be covered, same procedure as usual). Then a coat of white spray is applied, sprayed from above the model and lightly, so the upper areas are covered in white, while all the shadows stay dark grey to black. This method has two benefits, you see where shadows and lights will be placed later and the color gets a better surface to stick to, because this method creates a rougher ground ( the eye won't see the difference, but the paint will notice for sure :) )

The next step is masking all the areas, we don't want to be green. The tamyia clear colors we will use as finish will create a real flat and slippery surface and as I head to learn the hard way on another project, it is really hard to paint on that surface later.
I use tamyia masking tape, but you also can use different tapes, just be sure to stick them to any surface a few times before using them on the model, so it won't take the color with it when unmasked.

Now the airbrush work begins. I use a low pressure, around 1 bar. The colors are thinned in seperate cups, to avoid that flakes of paint jam our spray gun. The thinner is Tamyia X20-A thinner (GW colors wont work for airbrushing if thinned with water). Be sure to wear a mask and open every window you can while working with this stuff!
All GW Colors are diluted ca 6 parts thinner, 1 part paint, but I have to admit I never really care, it is more an intuitive thing for me when I am in workflow.
The clears just need little dilution.
Our first color is Games Workshop Castellan Green. We spray rough and big areas where our shadows should be later. Work with thin coats of paint, going over and over the model again! We don't want a covering layer, but many transparent ones that create a natural color gradient. I spray the lower parts of the big side areas and preshade the rims of every plate, where the next plate joins the last one.


For the next step we mix a small amount of GW Incubbi Darkness into our basic color. Again we use several transparent layers to make our shadow areas darker, taking care to spray smaller areas then in step 1! This adds contrast to our gradient.

To finish our shadow areas mix in a small amount of GW Abbadon Black. Again, light transparent color layer, just applied in the lowest areas and the rims. You can repeat the mixing in of more black as often as you wish, I used 2 different darker tones.


Time to enlighten the whole thing! We take pure Castellan Green again and mix in a small amount of GW Flash Git Yellow. Be carefull, the yellow has a real strong impact on the green and we dont want our first layer to bright!
Look at the still white areas in the pictures above, that is were we spray our ligt color. By leaving them white we have a bright surface and applied color will be bright and shiny. We would need much more layers if this area would be as dark as the rest of our drone has become. A very light layer is sprayed overlapping with the shadow area, to smooth the gradient.


The whole gradient needs more contrast and we mix in more Fash Git Yellow. Again, transparent layers and smaller areas covered with color.


For our final highlits I mixed in a little more Flash Git Yellow and a small amount of GW White Scar. The result is a very bright and shiny tone.


Now the basic work is finished. Lets achieve the shiny/slimy/demonic glow effect ...
First three coats of GW Ardcoat (gloss varnish) were applied to provide a shiny surface and strengthen the effect of the clears.

These colors are great. Applied to a white surface they will colorize it, as more layers you apply, as stronger shine and color will be. But you can also use them on colored surfaces, to add some more depth, vary the tone and so on. (Thats another reason why we left the highlight areas white during the first steps, the clear will have a great effect in this areas).
There were some problems with the camera and sadly some pictures are missing, I'll try to explain and show you the result of the clear work...
I started with two coats of clear green, this colorizes everything and adds shine.
The upper areas were then sprayed with a few layers of clear yellow, because the green had somehow weakened the yellowish appearence of the highlight areas (which I really liked).
The shadow areas were sprayed with a little clear blue.


Then we apply some more gloss varnish to protect our work.
Part two - the skin
We start with Nurgling Green as basic color, and add Slanesh Grey where shadows would be, using the wet in wet technique, which means we cover the area with Nurgling Green that is creamy and add thick Slanesh Grey direct on the model, while the Green is still wet, then we blend both together, using the miniature as palette.
Paint small areas, so the color doesn't dry to fast.

We add more Slanesh Grey to the shadows, using thinned layers.


Now we add Deamonette Hide to the shadows, covering smaller and smaller areas.


Again, some trouble during my last system crash, some pictures missing. So I'll describe what I did and show the results, but I think you can see what I did.
I used Brass Scorpion as basic color for all the metal parts. The i painted Screaming Bell to random metal bits, to achieve a variation of tones. The Screaming Bell will bring out a red metal color.
I mixed Vallejo Silver into the colors to highlight them and used more and more Abbadon Black to create shadows.


I painted all metal parts this way, painted the big lens with dark flesh, mixed with screamin scull to highlight.
Part four - The result
Now lets see how all this comes together.


I know this article is short at some points, but the most important part, the demonic armour, is detailed.
You can find many great tutorials in the web, using oil color and painting skin tones, metal etc.
I hope you learned something new here and maybe I could inspire a few.
Greets Martin
Part two - the skin
We start with Nurgling Green as basic color, and add Slanesh Grey where shadows would be, using the wet in wet technique, which means we cover the area with Nurgling Green that is creamy and add thick Slanesh Grey direct on the model, while the Green is still wet, then we blend both together, using the miniature as palette.
Paint small areas, so the color doesn't dry to fast.

We add more Slanesh Grey to the shadows, using thinned layers.


Now we add Deamonette Hide to the shadows, covering smaller and smaller areas.

For the last shadows, we add Dark Sea Blue to our mixture.
The lights were painted using mixtures of Nurgling Green and Sreaming Scull.


Some of the more rotten areas were covered with Lamenters Yellow, but it didn't effect the end result, after the oiling. Because I want to own a finished army in about ten years, I decided not to work this areas out.
Now the oil color is applied to the skin, after some drying we remove the bigger part of it with a clean brush and white spirit.
The goal is to add more depth to the wrinkles.


Part three - the metal bits
I used Brass Scorpion as basic color for all the metal parts. The i painted Screaming Bell to random metal bits, to achieve a variation of tones. The Screaming Bell will bring out a red metal color.
I mixed Vallejo Silver into the colors to highlight them and used more and more Abbadon Black to create shadows.


Part four - The result
Now lets see how all this comes together.


You can find many great tutorials in the web, using oil color and painting skin tones, metal etc.
I hope you learned something new here and maybe I could inspire a few.
Greets Martin