Posts mit dem Label Miniature Painting werden angezeigt. Alle Posts anzeigen

Donnerstag, 8. November 2012

Finally Pictures

Aloha to you, dear reader.
I finally managed to take some pictures of the last few projects, I finished. And I noticed, that it has been over 1 1/2 years since I posted some of my miniatures - oh, what a shame.....
So, enough words, bring in the pics:


King Maulg, Lord of the Trolls
Figorin 54 mm


King Leonidas
Yedharo 54 mm


The Lord of Carnage, Champion of Khorne
Games Workshop/Scratchbuild 32 mm


Conan, the ursuper
Nucturna Models 54 mm


Lord of Decay, Champion of Nurgle
Games Workshop 32 mm


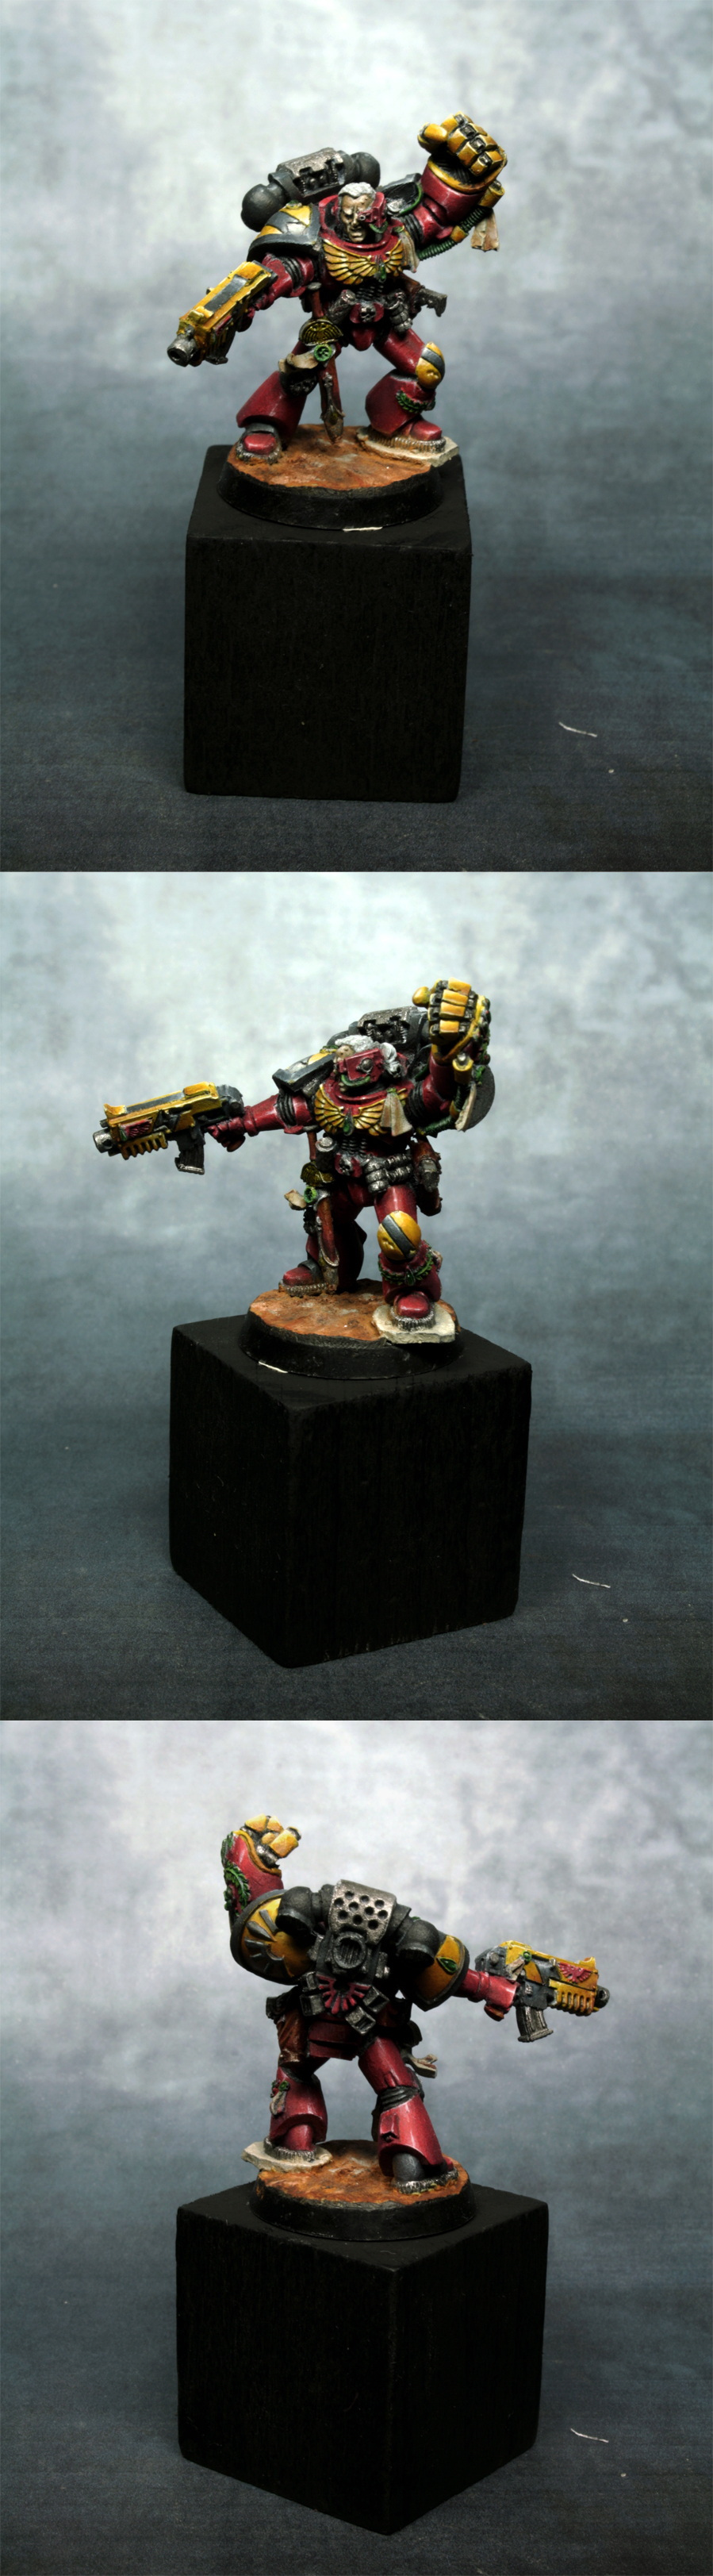
Blood Angle
Games Workshop 32 mm


I really had some fun painting all these little fellows, especially the Space Marine on his Juggernaut was a real pleasure. Both the conversion and the painting process taught me so much....

So, I hope you like this bunch of guys
Greetz Bloody


Montag, 9. April 2012

Review and Tutorial : go create crackle coating

Today I'd like to show you some great stuff we found in a big hobby store.
It is called go create crackle coating and is an acrylic painting medium to achieve an old, used look of color.
Many of  you will know the Tim Holtz Distress Crackle Paint, which was shown in a great tutorial over at Massive Voodoo : http://massivevoodoo.blogspot.de/2011/03/tutorial-working-with-crackel-medium.html

The stuff we are talking about today is really different, other ways to use it, other results and other possible scales.
I'll begin with a short introduction of the product it self, how it is used, what should be known about it...and so on. The second part of todays post will show a little project I am working on right now.

Part One - The medium


As I said, the medium is acrylic based, so it can be thinned with water (I didn't try how this affects the results yet) and you can clean your brush with water and soap after applying it.

We bought that stuff at Boesner, a huge art shop.
I'll add their web address, so you can check out whether there is one near you, or you'll have to use their online shop: http://www.boesner.com/boesner/servlet/frontend/articleDetail.html?btUid=bt_Article&iDf_id=c0a81e6:-4cd97d27:10a032c891a:35c8&3rdKeywordOID=7f001:-47182655:11957e3ca1e:-77a1&2ndKeywordOID=7f001:-47182655:11957e3ca1e:-77a4&showAll=true&1stKeywordOID=7f001:-47182655:11957e3ca1e:-7944

The medium isn't that expensive for the big amount you get I think. It's very fertile.

You have to prime your surface with any colour your cracks should have in the end.

Then you apply the crackle coating, the bottle says to use steady brush strokes in one direction.
In the end, 80 % of the big cracks will run with the direction of the stroke, so you can achieve a more chaotic pattern by simply ignoring the manual :)
Another thing you can follow or ignore is the thickness of medium you apply. The manual advises a thin coat,
but a thick will intensify the results.

After everything dried (be sure it dried...or else you'll rip off the medium with the first brush stroke) you can apply any acrylic colour you like.

Again the manual advises us to use: short and gentle strokes with a thin coat of colour.
Fat coats will again intensify the result. (and have a way more intensive colour)

That all sounds very theoretical...and so I made a few tests to show you what results can be achieved.


You can see different consistences (more or less water)  from left to right.
The first row shows the colour applied thick, without taking the water out of it with a paper towel, your hand...
The second row shows the colour applied thin.

The red and green spots on the right where Tamya Clear Red and Liquid Greenstuff. Both weren't effected.

As you see, the results very really strong.
I'll do some testing on miniatures (I am thinking of sockets with a worn look, and old wood with really thin colour) and will show you my experiences soon.

Part Two - Bigger scales and use on furniture
I decided to redo my wardrobe, it is old kitchen furniture a friend gave to me when I moved into my new flat. It had stains, scratches and was white...nothing I like :)


So I took the first thing to hand, some chaos black spray because I wanted strong contrast between cracks and colour.


If you want to do something really big, like this door, don't use anything as a pallete then the big thing itself.
I used some bowl, but most of the medium wasn't usable, because it liked that bowl so much...the stuff is tough and sticky.


I decided to ignore the manual, as I always do, and applied very different layers of medium, some areas were thin as advised, others were really fat and needed hours to dry.
The medium keeps its shine in some areas, even when it dried. So testing around is your friend, if it doesn't stick to your fingers, it is dry.


Then I applied some colour, simple wall paint I used for my whole room.
Nice to know: You'll just have one stroke per area...if you brush over it again, you will take much of the medium with your brush and much of the color. So be sure your colour covers with thin layers. 
That problem didn't trouble me at the testing card I showed above, so maybe it was the wall paint or the fat coat of medium....don't know.

The crackling starts immediately.

After 20 minutes...


Everything dry and ready for further work.

Where the medium was really thick, big cracks showed up, that run into one direction, in the thinner areas you find small cracks that run chaotic, just as the Tim Holtz Crackle Paint achieves.

Have a nice day everyone

Montag, 13. Februar 2012

Fast molds with two component silicone SI6GB

Hello out there!
You can find many tutorials about silicone molds in the Internet (I suggest the HirstArts homepage), but today I want to show you something which was new to me.
My friend Mati aka Badsmile (you can find him over at http://massivevoodoo.blogspot.com/ )
told me about this very useful stuff, called SI6GB two component silicone.

The greatest advantage is  simple, you don't have to mix a big amount of silicone with a tiny amount of curing agent (which can be very hard to do and destroy your whole work if done wrong).
Instead you take 50 % of component A, 50 % of component B mix them together and you are ready to mold.

The second advantage is the time you need. While the old silicone I used (Silcotin HB) took hours to dry out (a whole day until you could actually cast something) the new one needs 60 minutes do get hard enough to get your master out and just 3 hours until you can start casting.

So it is easier, faster and I couldn't notice  big differences in price.

You can buy the silicone at ebay in different amounts.

Notice that you should not mold and cast whole minis from manufacturers!
It is illegal and you hurt the company (especially little miniature manufacturers need every cent they can).
This is for self-created stuff and little bitz you might need.


And now how to mold:

The things we need:
- some lego to build our mold
- SI6GB two component silicone
- a few cups (take the ones you just use one time, for you will never be able to clean your favorite mug)
- an old brush
- some sticks to stir
- your master
- mold release agent

Build the  form to pour the silicone in, best for that is lego, because you can build thousand of different forms again and again. Silicone is expensive, you shouldn't waste some with to large forms!  Be sure to glue the stones to your ground plate (which should be water resistant). I use double-sided tape for that.
For this tutorial, I will mold a little cogwheel, because I had no other masters around.


Take dry rice (or anything else you can through in, should be dry and non-sticky) and fill your form (with master in it).


Now take the rice and weigh the amount. This will give us a rough amount of silicone we will need.
I usually take 5 to 10 gram more to be on the safe side.


Now take the release agent and your first brush (be sure to clean it very careful or better use a new one later) and brush the whole form (for better release) and the master. It is very important that you don't take to big amounts, we don't want detail to get lost. Everything should be smooth and there shouldn't be visible brush strokes or hairs.

 By the way this are the two components:


Start filling your cup with component A (or B if you prefer, no difference at all) and weigh carefully!
It should be 50:50 and differences can slow the drying process or even make it impossible!


Then fill the next component, be sure to have the same amount. Then you have one to two minutes to mix them up, you should stir slowly and careful, we don't want to much bubbles (I never get it without, so don't worry a few are ok). Be sure to stir at the edges too.
The result should look mint green.

The components before mixing and the ready silicone.:


Then take your second brush and a small amount of silicone. Brush it to your master and be sure to push all the bubbles out and silicone into every small crack and hole. This ensures that every detail will be molded.


If you don't notice your photoslaves taking shots of you, you are just focused enough :)


Pour the silicone in. It works best if applied beside the master, so we don't push our first brushed layer away. After filling, knock against the table to shake out air bubbles. This can be done for five minutes, was enough for this example. Let it dry (and don't....DON'T be impatient) for 60 minutes.


Be sure to put all your projects far away from silicone and molding.


If you want to use your tools more than one time clean them instantly.


After 60 minutes you can remove the legos and your master. Now just wait another two hours and start casting. This is our first mold with the new material and it didn't came out perfect but there where some negative conditions (cold around, very impatient as always, my mind was far away at some troubles that haunt me this days).
I sure will show you our new forms, when they are done.


Only one thing left to say, this stuff is awesome, molding becomes way easier with it.
Happy molding and greets!

Sonntag, 5. Februar 2012

Apocalyptic Mustang

Hello everyone out there :)

Today I want to show you another project that I began last year because of the Massive Vodoo Mad Max Car Competition. If you don´t know the Mad Max films: watch them! There are .... special ^^ The movies are taking place at a apocalyptic time and everything is looking like crap from a pile of junk.
This is a Mustang Convertible 1968 from Revell. I added some things because at such a time you don´t have the right stuff to repair your car. Everything is good enough. Even a little pig ;)
First step was to choose a color for my Mustang. He will look grey with two stripes of orange that I will add at the end. Next step will be to paint all the little items.

Greetings,
Sandy


Donnerstag, 2. Februar 2012

PAINting red or I'll do it till I get it

Everyone has his own weaknesses, for some of us it is a special technique like blendings or lights, some don't like the way some colors turn out...you all know what I mean.
My personal enemy is red. I tried it since my very first army (Scab Red with just one highlight...good old times^^) and never was satisfied.
After a great Mini, painted by Raffaele Picca, I decided to fight again and my victim of choice was a skeleton knight from Games Workshop.
I had to paint him anyways for an internal competition and so I started one night, half asleep and with minimum thoughts :)
Until now mainly the red armour took my time and I'd like to show you what I've done so far.


It is GW Scab Red as main color, shadows done with a mix of Scab Red and Vallejo Dark Sea Blue (thanks a lot Raffa for that tip), the highligths with Scab Red/Blood Red/Dwarf Flesh.
First sketching was done with wet in wet technique, than I softened everything with thin glazes.
I also wanted to practice battle damage once more, I did it hundreds of times at my bus, but I didn't highlight the damage  back than.
Painting that little line under your damage is something I have to do again and again but slowly I notice it gets easier.
I would be happy if you drop some words on that little fellow.
Greets Martin

Mittwoch, 1. Februar 2012

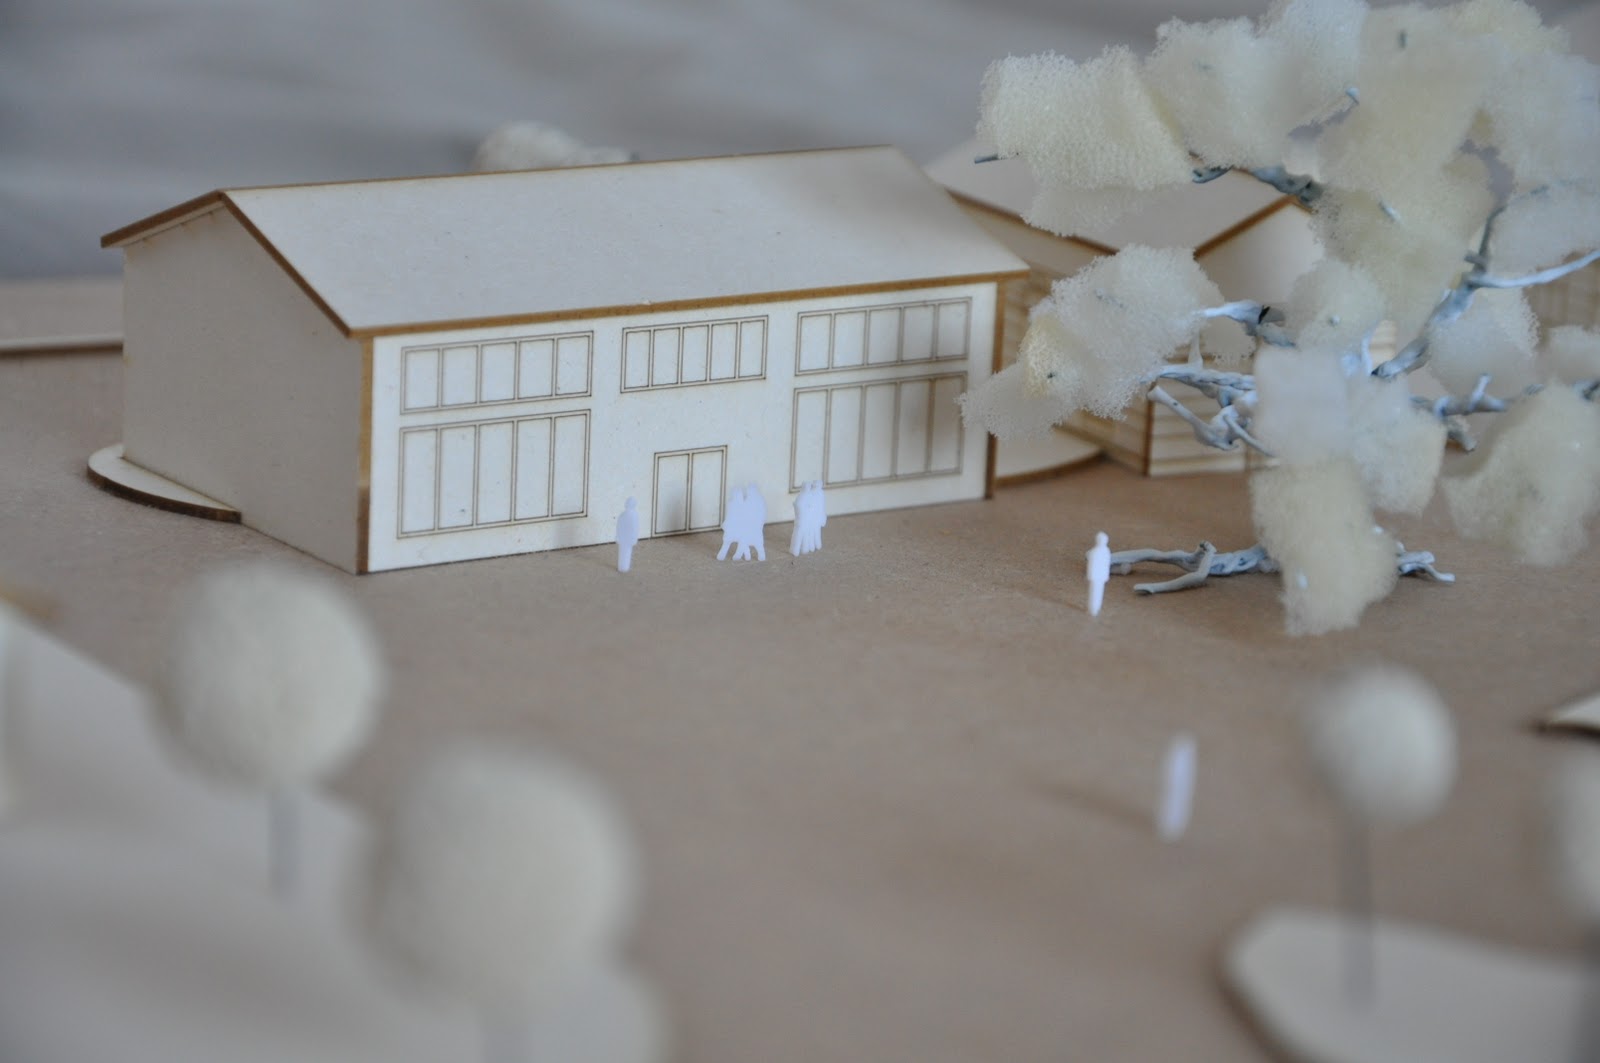
Lasercutting and some impressions on architectural modelbuilding

Today I'll show you my model built for my big draft this term and talk about a very interesting technique, named lasercutting.

Some of you will know lasercutting, there are a lot of companies offering parts or complete kits of buildings.
It is a very cheap and fast method to create two dimensional pieces, which also can be engraved with lines, text or things like that. (And from this parts you can build threedimensional stuff very easy)
Here are a few pieces I made for my draft model :


How does it work?
First you have to draw a vectorbased plan with all the lines you want to cut or engrave (good planning is really important, you have to know which lines shall be cut or engraved at this point because you have to draw them on different layers and there should't be two lines doubled for construction)
and bring it to some file format the lasercutter is able to read.
Then the cutter will follow the lines and burn them out, with high power for cutting and lower for engraving.
I am planning to write a tutorial about this whole thing, with screenshots and everything needed.

Now you may think...for what? Nobody owns such a thing (well, nobody I know)...
here comes the good message :)
I think every university and many schools of engineering own one at their mathematic or architectural faculty.
At least here in germany thats the case.
From now on, I just can talk about my university, but I think it won't differ that much.
They make a special price for students, for ALL students, not just architects and mathstudents!
That means, if you are a student or know one, that would have an hour for you, you CAN use a lasercutter.
Sounds good, doesn't it?

What can you do with this babies?
Well you could make your own buildings for tabletop gaming, detailed facades for showcase scenes, floors with wood, tiles,windows, doors ... and so on.
And it really isn't that hard to learn.
Also most faculties offer pc cabinets with the software needed, or you can use the 30 day trial time if you just do one thing.

This is another example of things possible. It's a very little building extension and you can see, how small the pieces can be:


The tutorial will need some time, another exam needs to be written but I hope I provoked some appetite :)

Now some pictures of my model:
First ones are the working model, where you check proportions and volumes and such stuff...things I like to do at my pc, but it was demanded.


All pieces after the laserwork:


This little tree was an important motive for my draft,so it had to stand out.
I tried an old technique (making trees from wire) with some new material: Liquid Greenstuff from Games Workshop. Used to I made the bark with gypsum or fimo soft, but liquid does a way quicker job and is absolutely fine for building up volume. The modell is scale 1:200 so the bark didn't need structure.
(Would fit perfect for Epic games) but for 28 mm gaming terrain I would do a final step with some putty to engrave the bark structure.


And finally some impressions after beeing ready (with sunrise light after a night of work :) )


Wish you a nice evening, I'll enjoy my giant hot chocolate and paint till my brush catches fire :)

Freitag, 27. Januar 2012

Some Wip

Some projects I am currently working on.

First a little speed paint, done for a funcompetition with someone at my german forum (Das Bemalforum).
I couldn't make the deadline, studies got me away from it for quite a while but I try to bring it to an end.
Goal was to paint it in only one week and till now I painted maybe 2 to 3 hours on that little fellow. I hope to finish it during another 3 hours, so that the spirit of "fast painting" will be practiced.
Siggi, I did't forget about our brushwar :)


Only finishing the base and some special effect have to be done...

Second a short hint on something I have to do for a competition at work (working part time at my local GW store).


Third is a little scene, called "To rule once more again".
Inspired by Skyrim, a centuries old king, who just didn't notice his domain fell under a new master.
Stones collected at my bus stop and brought to some grave hill shape. Just the first sketches of colour are done at the socket.


And last but not least a few details of Hackepeter.
Today I finished the renderings and blueprints for my big draft, presentation will be tuesday.
And after this, all these little scenes will get colour, looking for my painting vacation :)


Dienstag, 24. Januar 2012

One night - One miniature or thoughts about diversity

Some philosophy again.
Back in 2011, one day in summer I realized I was doing the stuff I learned...and nothing else.
Stagnation at the door, no guest you really like to have at your place.
What was going on? Well, there are two things that can lead to that state, at least I know that two.

First: New things scare you.
There are so many techniques to learn, some of them really tough stuff like non metallic metal, object source lighting and playing with different contrasts.
If you hear how much time it costs to paint something on a big project it is understandable that you might think it could be too much.
And if you do something, you really want to kick ass, then you will stick to this areas for hours until you don't want to see them anymore. (So many miniatures at my cabinet, staring at me and crying)
In the end this big unknown monster seems to be so terrible, you won't even start the figth.

Second: It is really easy to do stuff you know you're good at.
Human kind is lazy and that can kill every creativity. If you painted 10 miniatures with the same warm/cold contrast, why change? The eleventh will be ok too, you will be happy and fine...works for a few months.
But you will never learn to paint with complementary contrast, or even monochromatic.

Ah, recognized a third one...
Sometimes you don't know, whether you like a special effect/painting method/etc or not.
Personal, I don't put hours of effort and an expensive mini into the game, if I don't like the price.
Hope you get what I mean.

So I had to find a solution to this three problems, stopping me on my way.
I started with this thing I like to call one night - one mini.
We paint once a week in a little group, consisting of my girlfriend, a good friend of us and me.
I started with a little bust, just a torso and helmet of a Games Workshop Space Marine, with a little cork as socket. I decided to paint weathering effects on this bust, and I did.
4 hours, no big deal and nothing special for sure, but I did paint something I had't done before.
It was cheap, not big, so it could be painted in a short time and from spare parts, so if it failed it would be no problem. So all the three reasons were attacked.

If you do such a thing, nothing can go wrong, worst case is 4 hours of painting, while talking to friends and no completed mini in the end...but that would be the case if you wouldn't start at all.too, so nothing to loose.

Since then, this is my method to try out new stuff, effects or contrasts, colors etc. If I like the result, I take the technique and and practice at bigger projects, if not, I try something else.
This safes me loads of time and money and is really enjoyable.

I never paint on them again, after my night ended, I think that would kill the meaning of the whole thing.
But thats just my opinion.

Here are two of my one night shots, the marine and a little rat, called the prophet (all skaven players will understand).
Sandy also posted her latest a few hours ago.


Maybe some of you find themselves in the desriptions, and maybe this is something you would like to try.
If you do so, feel free to show us your results :)
So take your brushes and kill the thee monsters...