Dienstag, 27. August 2013

That is not dead which can eternal lie....

...and with strange aeons even Martin may write.

Hello my dear readers, I am back to blogging!
A few things about the silence, the future and the things I am doing right now.

I spent the best part of my summer lying sick in bed, and the rest trying to finish my draft, that I couldn't work at for weeks. In the end everything became a race against time and the days seemed to be nightmares. No time to paint or write articles, I think everybody will understand.
After finishing and being sick again (not my year I guess) I spent a short vacation over at Zaphods Palace in Berlin and finally found some rest. Now I think it's time to show you my draft model, give a sneak peak for my workshop, that will take place this weekend and finally, invite you to join us.

The draft
The draft was about urban planning, we had to work at a district in Hamburg. Some day I might lose some words on it, if someone is interested. Today just impressions.

early version of the work model...


...that finally was built in wood. Two nights of sawing, polishing and gluing and a big session in our Laserpool.

I am very happy how it turned out in the end. 

By far not my best rendering, but for an hour not to bad I guess.

The workshop
This weekend will be very special for me, as I'll travel to Göppingen to hold my first painting class.
The topic? Tanks! Weathering! Speedpainting! Everybody who knows my work could have guessed it.
Find the details here
As little preview just one of the things that will improve the learning effect, a step by step tank, showing the different stages of the process.


This weekend will be full of painting, nice people and big metal monsters.

The giveaway
I know, this is really really short time, but as our class still is very small (which guaranties intensive work with every participant ) I thought I'd invite you to join us. If you have time this weekend, an airbrush and compressor and the urge to learn how to paint awesome vehicles in no time, take part! New participants can pay at the workshop!

And one of you has the chance to win a FREE workshop weekend! You only pay the travel costs and a place to sleep. As weekend gets closer, I will draw and announce the winner TOMORROW evening!

Just like us at Facebook and comment todays post! If you don't use facebook, and don't want to register...no problem, comments here in this post will also have a chance to win!


Good luck and read you tomorrow evening, when the second stage by stage tank will be revealed...


Sonntag, 21. Juli 2013

Whoooommmmppp a swaaaaaaammmppp...Step by step, again...

Matuschiiiikaaaaaa dear readers!

A while ago I painted the nurgle dude, remember, I showed you the rust on the armor as a step by step. I've started building a base for him before eastern, and kept on building it till now.

Before I painted him I already build a base for him, but when I showed it do Grumbler from http://chromaticstimulus.blogspot.de/ he said it's booooooring as hell. So I asked him if he had an better idea, because my original plan was to keep it simple, was more about painting the miniature and not building a big scene. His idea was him walking over a field behind im everything is rotting, in front of him everything is still beautiful nature like. An apple is hanging on a tree in the front, a second rotten tree in the back. I thought about this idea and changed it in my mind to a scene where one tree is rotten and the other tree has a root where the miniature is standing on and from this root the rottening process starts for the second tree. Well while building it it changed to a quite normal rotten swamp nurgle theme. The idea itself is not very exciting anymore but, I tried to get some cool details in it. Flies, maggots, a three eyed frog, a nurgling in a sack and other nurgle stuff.

So here we start:


As trees I took some roots I bought in a flower shop, filled the holes with maskol and filled them from the inside with plaster. I took my saw and sawwwwwwed some parts off and mainly it were the parts I filled with plaster. So done the plasterthing for nothing...but before I did the plasterthing I didn't really know which roots I would use and which part of them. I also sawed the socket into the form I wanted it to be. I planned a pool on the lower level. Here's a first positioning of the miniature and the trees on the socket:


Then I used milliput for the ground and fixed the trees on the socket with some wire. I attached some roots to the trees to get to the vision I had on my mind of the swamp:


Then some more roots, more roots and more roots (I finished the root part a couple of times and everytime Luke and others were saying moooore roots, and I've been all the time afraid of painting it, because I didn't know if I would be able to reach everything with my brush), sand, skulls and other detailing stuff:


Finished, and foundation spray on it:


I sculpted a three eyed frog for the base and a nurgling (twice because forgot the first one in Berlin at the presidents mansion). I planned the nurgling to hang in a transparent birthsack on the tree in the front. The frog turned out to be in a jumping position and catching a fly during that, so he's kind of a multitaskingable frog, might be due to his third eye. Here is the sculpt of the nurgling and the wire of the frog:


Started the painting in brown tones with some purple and other colours:


Well as I planned to fill up the lower level with water, I had to replace the stone the frog is on with a bigger one made out of tree bark and superglue.

Base and stuff painted and waiting for the water:


For the base I glued some plasticard with superglue on the socket, the edge of it was as high as the border of the sand of the scene. For the nurgling I glued a stripe of transparent plastic into a wee hole in the middle of the belly of the nurgling. Also I've build a cube out of plasticard which was open on one side. One of the sides of the cube was higher than the other ones, I bend it over and glued the transparent plasctic stripe of the nurgling on it so that the nurgling was hanging freely in the middle of the cube.  I mixed the 2K water effect and coloured it with a drop or two of Tamiya clear yellow and clear green for the nurgling. I filled the water into the cube. 
I planned to put some more colour into the rest of the water which I wanted to use for the swamp. But then I noticed even though I mixed the water effect 30 minutes ago, the rest I left in the pot was already quite hard/dry, not flowing at all. When I started to pure in the components of the water effect into seperate pots, for the resin part first there came perfect liquid out of the bottle and then some crystallized stuff. Well like last time I put each pot into a warm water bath to make it more fluid, the crystals of the resin melted and it became liquid again. So as I said the water effect I wanted to use for the swamp was already near to dry, I had to mix a second round. This time there was nearly no liquid resin coming out of the bottle, just real thick crystallized resin. Again they melted in the warm water bath. So I mixed the two components and coloured them with red and green to get a brown tone (I think it turned out just red, but I'm not sure...curse you my red/green-colour deficiency). I pured the water on the base and left it overnight. 
This time even after weeks it wasn't completely dry. Well I got some ideas why, first I didn't have a transparent pot anymore two mix the two components in, so I just guessed that they were mixed well enough, which they might not have been....second the next day after I pured it in I had it standing next to the window in direct sunlight on a very warm day, I had the feeling that it got stickier than the last time I checked it before that. Third guess would be the consistence of the resin out of the bottle, the first run there was more liquid than crystals and it dried a lot faster than usual. Fourth guess would be the colouring process...

Anyway as it was a bit sticky on the top, I just hoped that it would be hard on the sides so I would just need to somehow cover the top area with something. I cut away the plasticard with knife and I was lucky, lucky, lucky, lucky...only a thin layer of liquid was between the palasticard and the dried water effect. So I just rubbed it away with a paper towel and sanded the rest. 


Used some gloss varnish and 1 K water effect to make the sides transparent again. For the top I used several thin layers of 1 K water. When one layer was dry, I pushed carefully on it with a toothpick, on some places the not dried 2 K water came through, rubbed it away and closed these holes with 1 K water. When that layer was dry I did the same thing again, and again, and again, and again, and again and again and again and again....till I was satisfied with the result (took about a week or two I think). The result isn't perfect but I didn't want to cut out the whole water effect with parts of the tree and do it all again. I took it as a lesson to make sure the water effect is perfectly mixed and not to leave it in the sun.


So I attached the mini to the base, glued the flies on, build more maggots and glued them on and finished the rust effect on the mini by setting some shadows and lights on some spots with pigments. Wellllll for the rust I had the feeling that over the time some of the 3D rust got rubbed off...dammit should have been more carefull with the mini. Ahh I nearly forgot the flies...I took some plastic foil which was stiff enough but still really thin. I used a punch set and punched some circles out of the foil and afterwards used a smaller punch to cut away a bit of the circle so that the original circle looked winglike to me. 


I then took some really thin wire (long enough to be able to hold it), put a drop of super glue gel on one end of it, attached the wings, put some activator on it, and cut the end of the wire with the wings on off. Painted the fly black and then some gloss varnish. Done.


For the nurgling I cut of most of the square and then sanded it down into the form of a drop, 1 K water to make it transparent again. Glued it onto the tree and painted it with a mix of Tamiya clear smoke, red and green. For the strings I let the mix dry a bit and picked up the skin with a toothpick and attached the string to the  birthsack.


Here are some pictures of the flies, the frog and the birthsack and a link to some more pictures:


I'll make better pictures of that scene later this year when I've bought a new camera.

Hope you like this little step by step, and you get something out of my stupid mistakes.

Cheeeeeeeeeeerio!


Dienstag, 16. Juli 2013

Workshop with Jeremie (Beginning of July) Rappporrrrt!

Bonjour!

At the beginning of July I stayed a week at my friends place, the home of our all president Zaphod Beeblebrox ( http://masterminis.blogspot.com ). After a week of painting, video gaming and slave labour it ended in an workshop with the world famous, marvellously talented, astoningishly beautifull Jérémie Bonamant Teboul!


He showed us his way of painting (which he also shows on his second DVD which was released this year) all weekend long. It's kind of mixing the techniques, like wetblending, blending, layering, feathering just as he needs them and just as it pleases him. We started with his wetblending technique and started to switch techniques to become more clear. See how wet it is and how the students are eager to learn from the master:


For me wetblending is a bit harder to perform than for others, because I'm not a brushlicker (which really helps with this technique due to the viscosity of the magic juju spit). Also it was quiet warm that weekend and the colour dried very fast on the wet palette and the brush. But enough of the excuses of my crappy result (will definetly throw it into the airbrush cleaner and give it proper paintjob).


It was really nice to see his way of painting and to hear his philosophie of painting. 

On Saturday evening we went to a restaurant to eat sommmme piiiiizzzzaaaaa!


So in total it was a really nice weekend! Thanks JBT for teaching us his path of paint!

Here a link to some more pictures on Facebook by the Battlefield-Berlin-Store:

https://www.facebook.com/media/set/?set=a.642767979086359.1073741839.129055793790916&type=3


Boyboy.

Donnerstag, 4. Juli 2013

Workshop with Karol Rudyk Report (beginning of June)

Flitschikowski my fellow paintbottlecrackers!

In beginning of june I've been to a workshop weekend at the http://www.shop.battlefield-berlin.de/ to participate in a workshop with Karol Rudyk https://www.facebook.com/KarolRudykArt . As I have seen some of his work before the workshop I was quite looking forward to the workshop, aslo because the topic was an interesting choice "nurgle skin", from a painter of whom I've seen super cool NMM and freehand stuff. The miniature for that workshop was the stone giant from scibor.

Preparing the miniature was kind of easy kind of tricky. This was because due to all the structure going on on that miniature it was not easy to spot the places to fix, but  because of all the structure going on on that miniature it didn't matter to find all the spots to fix.

So after preparing the model and spraying the foundation on it, he showed us some airbrush work. We sprayed the base colour, then sprayed the shadows in three steps from a everytime more perpendicular angle with a more and more darker colour (last one was spraying from the bottom -hope you get what I mean), then in three steps the lights same way but spraying from the top as last step.
It was time for the brush. Because it was his second workshop (I think) and didn't have so much experience with workshops, we all together decided just to paint the face. He used quite thick paints and absolutely near to dead brushes, well some were still okay, but the result was great. We painted ourselfes through contrast lessons and special effect stuff and I think the results were looking niiiiiccccceeeee!

Here is my result, photographed with flash because it just looks awesome this way:


The whole weekend, the dudes and the workshop were very cool. We learned quite some stuff and Karol is just an awesome guy! He took his time to answer all the questions everyone had and really did a good job in doing so.
I'm really looking forward to another workshop with him sometime in the future with NMM and freehands as a topic! And of cause I'm looking forward to meet the nice Karol fellow again!

Here are some links to pictures from Baphomet (Massivevoodoo) and the Battlefield store:

https://www.dropbox.com/sh/0cujf5439qs1skw/V7hOGMzIcX

https://www.facebook.com/media/set/?set=a.629158373780653.1073741837.129055793790916&type=3

So hope you liked the short report!

Montag, 1. Juli 2013

Not very in scene Barbarian...

Ungtokmogtok!

Again a miniature finished buuuut no idea for the base at the moment. I painted him two weeks ago on the weekend and it was just about painting the miniature because he was he was in my cabinet prepared and ready to be painted for a while now.
So on the friday back than it was his time to be painted. Years ago I bought the whole set of Vallejo Airbrush Metallic colours, even the green, the blue and the red. I wanted to try the red metallic. I feared that he would turn out colourfull like a carousel on a fair...this is how he looked after the base colours for the metallics (I mixed some metallic blue into the red...):


Miniature done:


I shadowed ALL metallics with Umbra and then with black mixed with dark angels green. Light is done with some more vallejo airbrush silver into the base colours. Skin is rotting flesh as the base colour, shadowed with umbra and liche purple for first shadow, some more umbra and lich purple for second, and some black in the mix for third, lightened up with white and enchanted blue into the base colour. Leathers are brown tones shadowed with liche purple, liche purple+black, lightened up with sunny skintone and ivory. Horns are kommando khaki, washed with mix of base colour and dark angels green, then some mix of liched purple and black for the shadows. Painted some lines withe ivory on the horns, washed the tips of the horns with ivory, painted some lines with white. Yeah I thinks thats about it, a fast 16 h paintjob just for fun, painted on two days.

As soon as I got an idea for the base, I'll let you know.

Hope to reddish you sooooon!

Samstag, 29. Juni 2013

Speedpainted Gobbo to start again

It's been way to long since I posted something. Thats because it's been way too long since I painted anything. Last Saturday I worked at our local store again, I was tired and it was damn warm (the color dried even on my wet palette) but I knew it was time again. 
So I bought this little Goblin and painted him during work, when there were no customers and our gamers didn't need me. He took two hours of painting, nothing breath taking but I reached my goal: paint again and finish him during work.
There are some personal troubles that kept me away from our beloved hobby and they still are their but I am trying to force myself into painting again. After the first 10 minutes it felt great again.


Have a nice weekend all of you!

Donnerstag, 27. Juni 2013

Walk my soldier, walk till there is no where to walk anymore!

Humtidumtey!

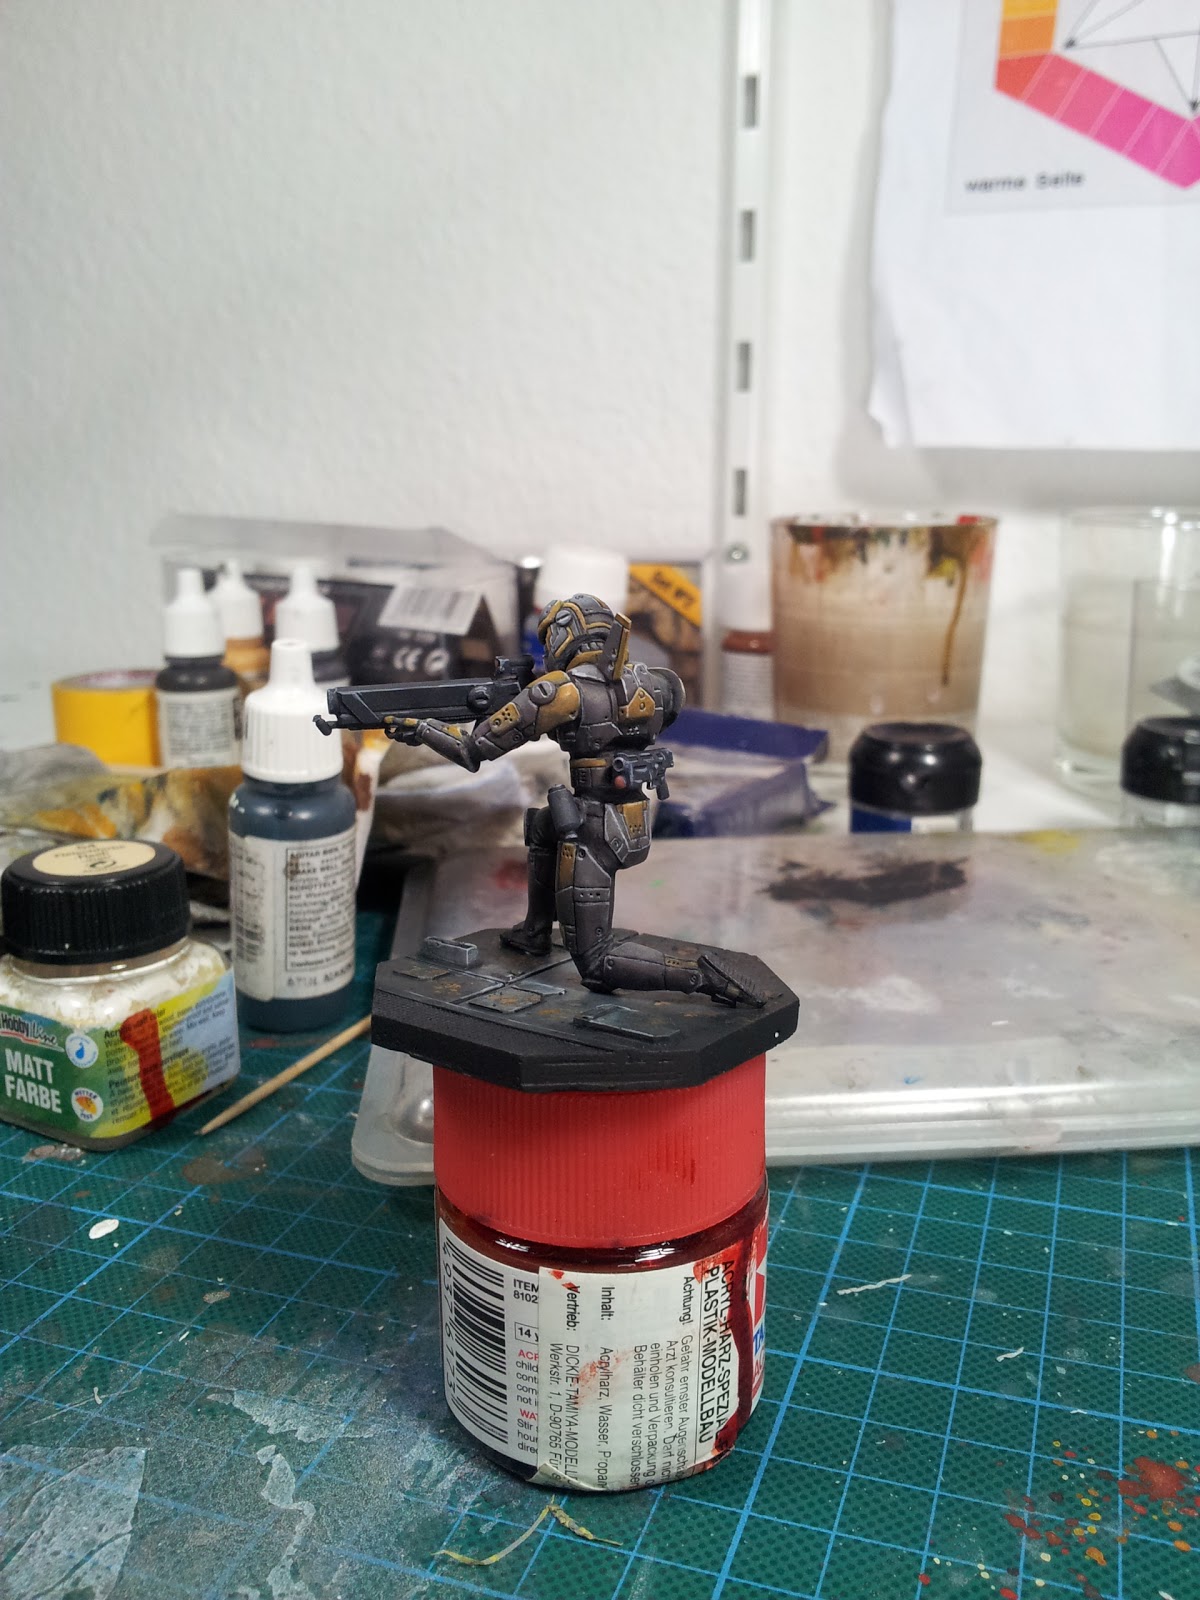
This is just a short post about a miniature I painted in april, which is not completely finished due to that my friend I painted it for wanted me to change some stuff I fucked up. First is the position of the arms....they have to be turned a bit up, for that I need to cut them off. Well as I don't have a saw fine enough for that job I brought the miniature to Berlin and he will do it himself. But after that I'll have to do some painting on the armor again. He wants camouflage on the armor. I talked to him about it and this is how I'll do it, the orange surfaces will stay the way they are, the gray surfaces will be camouflaged. I will use maskol to completely cover the orange surfaces and dots over the grey. Then sprey it with another gray tone, remove the maskol spots, put new ones on, spray with another gray tone and maybe same thing one or two more times. I'll show you the result when it's done, till then here's how he's looking at the moment:


Ah yeah and he said the face is to pale, I wasn't sure about how I feel about the face myself so, I'll do what he wants me to do with his face and give him a facial.

So smell you later