Montag, 24. September 2012

Schritt für Schritt: Eine Fahrzeugschwadron schnell auf hohem Niveau bemalen

Hallo meine Freunde, es ist Tutorialwoche!
Stolz präsentiere ich euch das größte Tutorial, das ich bisher geschrieben habe.
Ich habe gesprüht, gemalt, mit Schwämmen getupft und nochmal gemalt, Unmengen an Fotos gemacht, bearbeitet und die Nächte durchgeschrieben.
Und auf vielfachen Wunsch gibt es dieses Tutorial zum ersten mal zweisprachig!
Es ist in Deutsch und Englisch verfügbar.
Für die englische Version einfach hier klicken: Englische Version

Und nun, lasset es beginnen!


Sie sind der Kern vieler Armeen, ihre Waffen haben ein gewaltiges Schadenspotential, ihre Geschwindigkeit ist Grundlage vieler Schlachtpläne und sie überragen die übliche Infanterie bei weitem...Panzer!
Fast jeder Tabletopgeneral kommt irgendwann an den Punkt, an dem er eines, oder mehrere, dieser mechanischen Ungetüme sein Eigen nennen und in die Schlacht führen will.
Einen Panzer zu bemalen kann jedoch eine einschüchternde Aufgabe sein, eine ganze Schwadron (oder mehrere Transportpanzer für verschiedene Trupps) wirkt oft noch abschreckender.
Ich selbst spiele neben der Vitrinenmalerei immer noch gern ab und zu, und komme dank meiner allgemein bekannten Vorliebe für Fahrzeuge nie an ihnen vorbei.
In den letzten Jahren habe ich viele Erfahrungen im Bereich Fahrzeuge gesammelt, zeitsparende Techniken, kleine Tipps und Kniffe und allerlei nützliches zu Weathering und Kampfschäden.
Eine große Anzahl Panzer hat meinen Bemaltisch verlassen und als ich nach jahrelanger Abstinenz vom spielerischen Aspekt wieder einmal begann eine Armee zu sammeln, begann ich das im Vitrinenbereich erlernte umzusetzen und abzuändern, um eine schnelle Methode zu finden, deren Ergebnisse auf einem Schlachtfeld immer noch beeindruckend wirken.
Ein paar der Testobjekte könnt ihr hier sehen:

Ork Burna Bommer , chimera transport tank

Natürlich haben die wenigsten Leute die Zeit und die Lust 20 Stunden und mehr in einen Panzer zu stecken, der durchaus auch mal in der ersten Runde explodieren kann, aber wer von uns liebt es nicht, mit schönen Modellen zu spielen, die dem ganzen Leben einhauchen?
In dieser Artikelreihe möchte ich euch nun also zeigen, wie ihr mit vertretbarem Zeitaufwand beeindruckende Ergebnisse erzielen könnt.


Jeder der Artikel dieser Woche wird sich einem Aspekt des Arbeitsprozesses widmen und mit Fotos und Erklärungen Einblicke in die Welt des „Fahrzeugspeedpaintings“ geben.
Dies ist natürlich nur meine eigene Methode, es gibt jede Menge Alternativen, aber vielleicht finden einige unter euch Gefallen daran.


3 Leman Russ Kampfpanzer werden uns als Beispiele dienen.


Diese 3 Panzer werden außerdem am Ende der Artikelreihe auf Ebay zu finden sein, wenn ihr also während ihrem Entstehungsprozess bemerken solltet, dass ihr sie haben wollt, dann ist das möglich ;)


Teil 1 - Der Zusammenbau
 Es gibt ein paar einfache Grundlagen um Zeit zu sparen und effektiv zu arbeiten.
Erstens: Wisse was du tust, kenne das Modell und wie es funktioniert.
Ich studierte die Anleitung (etwas, das ich beim Vitrinenmalen grundsätzlich nicht tue, da ich es als einschränkend empfinde.) und dachte darüber nach, welche Teile sich für Baugruppen eignen und was seperat bemalt werden sollte.

Ich heftete alles an die Wand, um Unordnung auf dem Maltisch vorzubeugen.

Der zweite Schlüssel zum Erfolg ist Fließbandarbeit.
Das Konzept wurde bereits im 15. Jahrhundert angewandt und funktioniert bis heute bestens.
Wir wissen, dass wir 3 Panzer bauen wollen und wir wissen ebenso, dass wir jeden Schritt dreimal durchführen müssen. Entgraten, kleben, grundieren, erste Farbschicht, Camo, ...ihr wisst, was ich meine.
Also löse ich das selbe Teil aus jedem Gussrahmen, entgrate es, nehme das nächste und so weiter.
Während dieser Arbeit verfällt man in ein gedankenloses Wiederholen, aber das ist in Ordnung, denn darauf basiert das Konzept, man wird schneller und schneller. Die ersten Kettenglieder brauchten einige Minuten beim Entgraten, nach dem 10. ging es schneller von der Hand, während die letzten kaum noch Zeit benötigten.
Man bekommt ein Gefühl dafür, wie man ein bestimmtes Teil behandeln muss und kann die nachfolgendem mit diesem Wissen wesentlich schneller abfertigen. Ein Effekt, den wir nicht erreichen, wenn wir erst einen Panzer komplett bauen und danach den nächsten.
Versorgt euch mit Musik oder einem Freund zum Quatschen, denn diese Phase ist wirklich langweilig und
-atmig. Allerdings ist es die gesparte Zeit auch wert.

3 Gussrahmen, bereit bearbeitet zu werden. Es empfiehlt sich, nur die aktuellen Rahmen auf dem Tisch zu haben um Unordnung vorzubeugen (und die deprimierende Masse an noch vor uns liegendem auszublenden :) )

Die Werkzeuge und was man mit ihnen anstellt:

1: Ein Geodreieck, wird nur benötigt, wenn ihr zusätzliche Details scratchen wollt, wie neue Nietenreihen. Zum Schneiden/Prägen benutze ich ein Lineal mit Stahlkante.
2: Eine Bürste um Schleifstaub und kleine Plastikfitzel wegzubürsten, die beim Bohren/Schleifen/Entgraten anfallen.
3: Klammern um Teile während der Kleber trocknet festzuhalten.
4: Schraubzwingen, um kleine Platten auf dem Tisch zu befestigen.
5: Der gute alte Saitenschneider, der die Teile aus dem Gussrahmen trennt.
6: Bohrer für Waffenmündungen etc.
7: Skalpell zum entgraten. Nutzt eine frische Klinge und ihr spart Zeit und Nerven.
8: Gummibänder um große Teile während des Trocknens zusammenzuhalten.
9: Multifunktionswerkzeug zum Schleifen/Bohren...

Nicht alle Werkzeuge sind unbedingt nötig, aber hilfreich, wenn man sie hat.

Ein paar Impressionen meiner eigenen Fertigungsstraße.

Alle Seiten sind fertig entgratet bevor etwas geklebt wird.


Sie alle wollen entgratet werden...
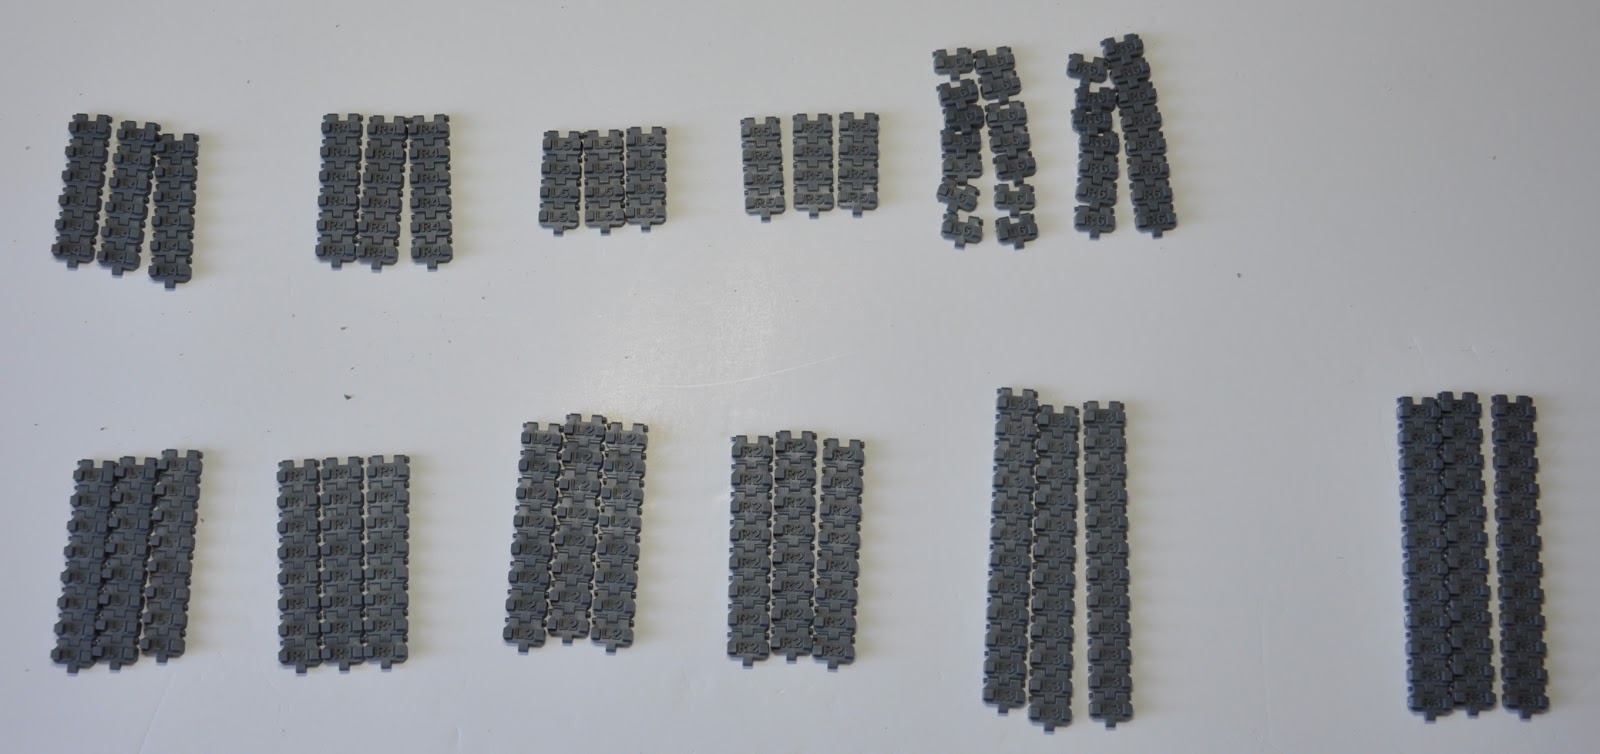

...und wenn ihr das geschafft habt und alles ordentlich vor euch liegt fühlt sich das verdammt gut an.
Fließbandarbeit bedeutet natürlich nicht, jedes Kettenglied einzeln aus allen 3 Rahmen zu trennen.
Wir wissen, dass im Grunde alle Kettenglieder das selbe Teil sind (von Form und Aufbau her) und dass wir das selbe mit ihnen anstellen müssen. Also werden alle aus dem Rahmen gelöst und in einem Rutsch entgratet. In diesem Bausatz sind sie sogar beschriftet, was das Ordnen sehr einfach macht.
Das ist das Grundprinzip, Gruppen von Teilen auswählen, die gleich behandelt werden müssen.

Auch das Kleben wird an allen Teilen gleichzeitig vorgenommen.

 Ich denke, es ist nicht nötig mehr vom Bauprozess zu zeigen, denn das hat schließlich jeder von uns schon hinter sich.
Panzer umzubauen ist der beste Weg die Zeit, die in ein Projekt fließt, mindestens zu verdoppeln, etwas, dass sich die wenigsten Spieler leisten können (sowohl von der Zei, als von den Ressourcen her).
Wir müssen trotzdem nicht völlig darauf verzichten!
Oft haben Schwadronen Kommandofahrzeuge (wenn auch nicht in den Regeln, fast immer im Hintergrund) und in dieses ein bisschen Zeit zu investieren ist ein einfacher Weg, am Ende eine persönliche Schwadron in Händen zu halten.
Ich entschied mich ein paar Kampfschäden, eine neue Panzerplatte mit Nieten, ein Banner (Ja, die coolen Panzer haben coole Banner...jedenfalls sollten sie das in meinen Augen haben :) ) und eine Vox-Einheit aus GW's Kommandofahrzeuggussrahmen hinzuzufügen.

Die Kampfschäden:
Man sollte sich Gedanken machen, wo man Schäden anbringt. Sie sehen schnell unglaubwürdig aus, wenn man es übertreibt, oder sie an den falschen Stellen anbringt. Außerdem beeinflusst ihre Position unter Umständen die spätere Bemalung.

Ich skizziere alle Schäden vor, um zu überprüfen, wie das Gesamtbild wirkt.

Ich schliff das Plastik mit dem Multiwerkzeug hauchdünn. Beim Arbeiten mit so einem Gerät unbedingt an die eigene Sicherheit denken, wenn der Schleifkopf platzt, fliegen die Teile mit hoher Geschwindigkeit durch den Raum.


Vergiss nie deine Sicherheit, ohne Augen ist es äußerst schwierig zu malen, also solltest du sie schützen

Um zu überprüfen, ob das Plastik dünn genug ist, halte ich es gegen eine Lampe. Wenn man Licht durchscheinen sieht, ist es genau richtig.

Mit dem Skalpell schneide ich ins Plastik, durch drehende Bewegungen verbiege ich die Plastikschicht und erzeuge den Effekt dünnen, verbogenen Bleches.


Die Innenseite muss vorher grundiert werden, da das Spray im zusammengebauten Zustand nicht mehr durch das Loch kommt und man Plastik hinter dem Schaden sieht.
Zusätzliche Panzerung anbringen:
Ich benutze einen Nietenstanzer von Trumpeter und ein dünnes Messingblech. Das Werkzeug zu benutzen ist einfach, man presst die Zähne des Rades ins Material und zieht eine Linie. Jeder Zahn hinterlässt eine Niete.


Man kann alternativ auch dünnen Plastikkarton benutzen. Wenn man mit der Platte zufrieden ist, einfach ankleben und fertig. Diese Platte ist ein kleines Experiment, da ich das Werkzeug selbst erst kürlich bekommen habe. Man wird sehen, wieviel man von den Nieten nach der Bemalung sieht. Im schlimmsten Fall haben wir eine weitere Schicht auf dem Heck, die Tiefer verleiht.


Das waren meine Gedanken zum Zusammenbau, nichts völlig neues, aber Dinge, die man im Hinterkopf haben sollte, wenn man auf effektives und zeitsparendes Arbeiten aus ist.

Morgen wirds bunt, ich zeige wie ich die Basisfarben aufgetragen habe und wie man mit einfachen, schnellen Techniken einen verwitterten und kampfgezeichneten Eindruck erweckt.

Die Tutorials brauchen eine Menge Zeit, die ich auch sehr gern in diesen Blog investiere, aber nichts desto trotz brauchen sie viel davon.
Ich würde mich freuen, wenn ihr einen Kommentar hinterlasst und dem Blog folgt, wenn euch gefällt, was ich hier mache.
Verpasst nicht diese Woche voller Hobbywahnsinn :)

Bis Morgen.

Samstag, 22. September 2012

Sign of life...

Long time without posting, work and health kept me away from blogging.
But the last days were buisy time, I spent my days building and painting a new Lord of the Rings gaming table for our local GW Hobbystore, painted tons of gaming terrain for our other tables and...
well I spent my nights painting, painting and painting again to present you the biggest series of articles this blog has seen so far.

But let's have a look on some pictures first...

The gaming table:


The whole thing is for the introduction games, I tried to create a few different scenes to tell a few interesting stories while playing with people who think about entering the hobby.
 All in All I built the whole thing in maybe 3 hours (most time between them was waiting for the wood glue to dry), airbrushed everything in another 3 and spent the same time using oil paints, adding final nuances and shades. Ah and not to forget...hours of glueing that little gras bundles in place :)

Second today, there are two little forests, expanding our fantasy terrain collection. Nothing special, but fun to do (well, at least the painting, cleaning the moldlines was horrible).
It took one and half an hour to paint them both, using an airbrush and the wonderful colour Seraphim Sepia to shade the leaves. It's fast and easy and adds depth to any gaming table. Think I am gonne built some more terrain for my own gaming group soon...


I felt some autumn in my heart, bright colours and falling leaves :) Soon the real world will follow.

And ... there was something...ah yes. the big thing to come.


Starting with monday there will be a BIG step by step tutorial, showing how to "speedpaint" a really nice looking vehicle squadron for your gaming army. (but lots of the thoughts may help you on your cabinet models too). For that tutorial I painted (and still are painting) three Leman Russ Battle Tanks.

Here is something to capture youre interest ;)


So have a look on monday :)
Nice weekend to everyone

Sonntag, 12. August 2012

Samstag, 11. August 2012

New step by step articles teaser, Blight Drone Tutorial extract and tutorial section launched

I am really happy to present you the new article and tutorial section !
You can find it linked on the front page.


For this blog is also a kind of diary, of my projects and thoughts, there are many posts just showing wip pictures and I think nobody wants to browse through all the months of posting, just to see wether there is something useful for him.
Every tutorial, product review and some philosophy articles, that had a great resonence, will be linked in the new section, sorted by name and category.
In the moment, there are just 6 articles, but the number will grow.

Right now I am working at three new ones, bigger  than any of the old ones.
There will be step by step articles, I remember how often I read the ones available when I started painting and they often were a great help. Whether you paint the same miniature, using the same techniques and colors or just using one effect, there is much to learn.

There will be one for the nurgle blight drone from forgeworld, one for creating fast but awesome  buildings for the gaming table and one explaining how to paint a vehicle squadron, fast and with stunning results. (aiming for the quality of the ork burna bommer and the  chimera tank (which is available at ebay until tomorrow evening) )

Writing them, taking all the pictures (which can be everything from hard to funny when you are alone) and editing them takes quite a time, but I'll present you an extract from the blight drone tutorial today :)
Maybe someone can use the effect achieved with the green armour. Whole article will follow soon.


...the model and socket were primed using the two component method, which means you spray the whole thing black first (everything should be covered, same procedure as usual). Then a coat of white spray is applied, sprayed from above the model and lightly, so the upper areas are covered in white, while all the shadows stay dark grey to black. This method has two benefits, you see where shadows and lights will be placed later and the color gets a better surface to stick to, because this method creates a rougher ground ( the eye won't see the difference, but the paint will notice for sure :) )

The next step is masking all the areas, we don't want to be green. The tamyia clear colors we will use as finish create a real flat and slippery surface and as I head to learn the hard way on another project, it is really hard to paint on that surface later.
I use tamyia masking tape, but you also can use different tapes, just be sure to stick them to any surface a few times before using them on the model, so it won't take the color with it when unmasked.
Now the airbrush work begins. I use a low pressure, around 1 bar. The colors are thinned in seperate cups, to avoid that flakes of paint jam our spray gun. The thinner is Tamyia X20-A thinner (GW colors wont work for airbrushing if thinned with water). Be sure to wear a mask and open every window you can while working with this stuff!
All GW Colors are diluted ca 6 parts thinner, 1 part paint, but I have to admit I never really care, it is more an intuitive thing for me when I am in workflow.
The clears just need little dilution.

Our first color is Games Workshop Castellan Green. We spray rough and big areas where our shadows should be later. Work with thin coats of paint, going over and over the model again! We don't want a covering layer, but many transparent ones that create a natural color gradient. I spray the lower parts of the big side areas and preshade the rims of every plate, where the next plate joins the last one.


For the next step we mix a small amount of GW Incubbi Darkness into our basic color. Again we use several transparent layers to make our shadow areas darker, taking care to spray smaller areas then in step 1! This adds contrast to our gradient.
To finish our shadow areas mix in a small amount of GW Abbadon Black. Again, light transparent color layer, just applied in the lowest areas and the rims. You can repeat the mixing in of more black as often as you wish, I used 2 different darker tones.


Time to enlighten the whole thing! We take pure Castellan Green again and mix in a small amount of GW Flash Git Yellow. Be carefull, the yellow has a real strong impact on the green and we dont want our first layer to bright!
Look at the still white areas in the pictures above, that is were we spray our ligt color. By leaving them white we have a bright surface and applied color will be bright and shiny. We would need much more layers if this area would be as dark as the rest of our drone has become. A very light layer is sprayed overlapping with the shadow area, to smooth the gradient.


The whole gradient needs more contrast and we mix in more Fash Git Yellow. Again, transparent layers and smaller areas covered with color.


For our final highlits I mixed in a little more Flash Git Yellow and a small amount of GW White Scar. The result is a very bright and shiny tone.


Now the basic work is finished. Lets achieve the shiny/slimy/demonic glow effect ...
First three coats of GW Ardcoat (gloss varnish) were applied to provide a shiny surface and strengthen the effect of the clears.


These colors are great. Applied to a white surface they will colorize it, as more layers you apply, as stronger shine and color will be. But you can also use them on colores surfaces, to add some more depth, vary the tone and so on. (Thats another reason why we left the highlight areas white during the first steps, the clear will have a great effect in this areas).
There were some problems with the camera and sadly some pictures are missing, I'll try to explain and show you the result of the clear work...
I started with two coats of clear green, this colorizes everything and adds shine.
The upper areas were then sprayed with a few layers of clear yellow, because the green had somehow weakened the yellowish appearence of the highlight areas (which I really liked).
The shadow areas were sprayed with a little clear blue.


...

I hope you enjoyed that little extract.
Read you soon

Mittwoch, 8. August 2012

New atelier finished, new team member and thanks to my readers...

Everything is new then I guess.
There were so much changes during the last months, moving into the new flat with my best friend, getting my own atelier room (well, in the end everything has a good side, I just got the room because our friends were to loud to use it during nights for gaming) and getting more and more interior, using old furniture from the streets (thanks to everyone who threw away my new interior :) ).
Now I reached a special point, it is time to say  the biggest part is finished.
There are always minor changes, but everything is here now.
Enough room for 4 painters (not that there actually ARE 4 painters, but I like to have visitors), enough room to store my materials and projects, a place to assemble, a place to paint, a place to airbrush and finally again some music.


The team itself also changed three times. Some of you might remember. Trying to share this blog with people who were important to me was a great thing, as long as it worked...which wasn't that long in both cases.
I don't know whether you two are still reading this, but thanks, for a great time, many laughs and so much creativity. I am glad we had our time.
Now it is just me left, and because that can be very lonely from time to time, I decided to get someone new into business...(well, she is a sort of visitor for two months) 


She is trying to paint with me (some would say she just likes biting my brushes when I use them...) and is my main source of inspiration and good mood this days. Love her.

It has been a long time now, nearly 8 months since we started this blog and although it went into a never expected direction, I love doing it. And I won't stop, thats sure.

The last months were a period of trying, and much learning.
That things now will have their impact here, for example there will be an article section soon, inspired by the great blog Massive Voodoo (who inspired me to start this whole thing in the first place). There are tons of cool things here, but it is really hard to find them, if you don't know they are existing.

I am also looking forward for the biggest article that I did so far...a complete step by step guide to paint vehicle squadrons in short time and high gaming quality. Finishing him will take some time, but it will be very cool I promise.

I'd like to end todays post with saying thanks to you..thanks to all my followers, for I enjoy every time a new one decides to follow. Thanks to all the people reading the blog, it is an incredible feeling to know that sometimes over 300 people see my projects per day.
And special thanks to everyone who takes a minute to type a comment from time to time, your feedback is a great thing and makes me happy all the times.

If you got some hints, how to improve this blog let me know my friends.

Have a nice day, with some colorful moments...
Martin

Sonntag, 5. August 2012

Chimera on Ebay now

Another model hits the bay, another chance for you to get your hands on something I made.
This is the second time I have to sell a model, and what shall I say, it gets easier to accept it will leave next sunday.


You can find high resolution pictures here at Cmon: http://www.coolminiornot.com/311408
Thanks to everyone, who takes the minute to vote! Your ratings are my advertisement and without your help, there would possibly be no selling.

And here is the link to Ebay:
http://www.ebay.de/itm/271031214478?ssPageName=STRK:MESELX:IT&_trksid=p3984.m1555.l2649

As always, the first bid is 1 Euro. Take your chance and get him ;)